| Author |
 Topic Topic  |
|
QuentinG
United Kingdom
2 Posts |
 Posted - 17 Feb 2024 : 21:54:12 Posted - 17 Feb 2024 : 21:54:12


|
What an amazing ingenious restoration, congratulations.
The car has a great Hampshire number too.
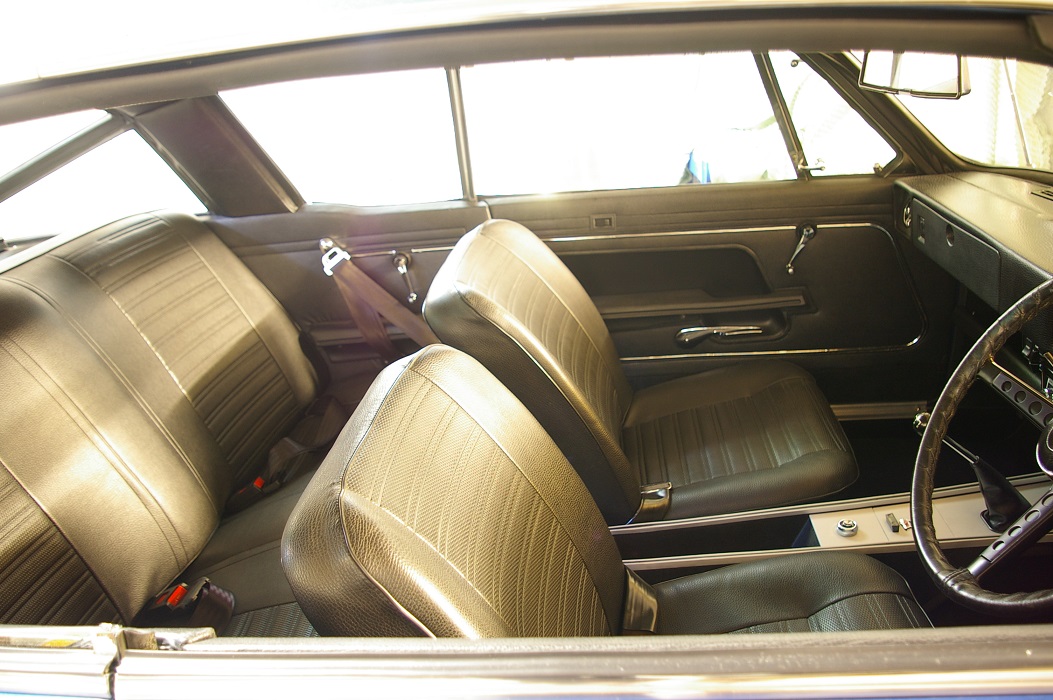
I rather like the blue interior, I think my black interior is rather sombre combined with the Baltic Blue exterior - It was originally Tahiti Blue.
I have my new radio in the same position but went for speakers under the front seats. |
 |
|
|
Sunbeam-mike
United Kingdom
176 Posts |
Posted - 08 Oct 2021 : 16:28:51
|
Outstanding!
Looks like it never left the show room.
The period 'accessories' are the icing on the cake.
Mike
Mike Hooper |
|
|
|
jimlagos
United Kingdom
205 Posts |
Posted - 03 Oct 2021 : 17:28:30
|
It actually looks better than new! Congratulations and respect for your hard work.
jim |
|
|
|
Panky
United Kingdom
70 Posts |
Posted - 03 Oct 2021 : 14:07:31


|
Absolutely stunning, totally gorgeous, a gem - can you guess I like it |
|
|
|
AAA
49 Posts |
Posted - 03 Oct 2021 : 13:23:06
|
ALL DONE!
One or two small adjustments needed, but that's about it!


Out of the garage...
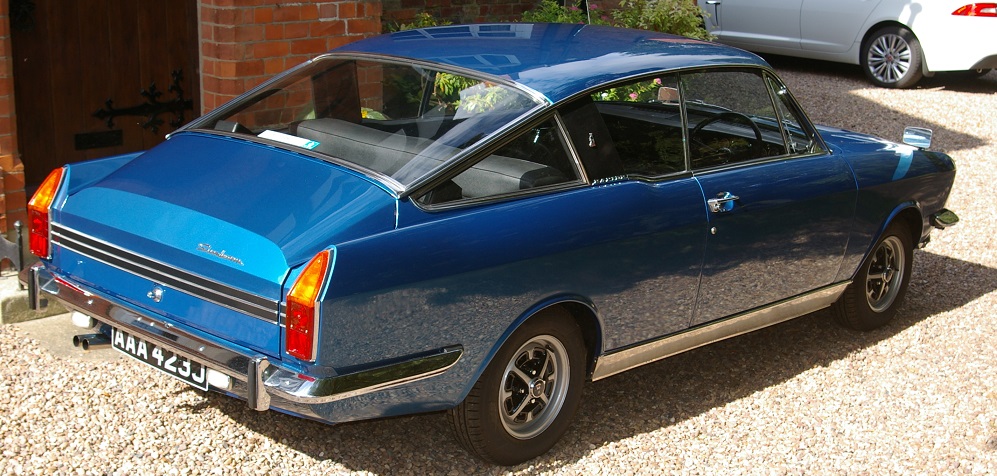
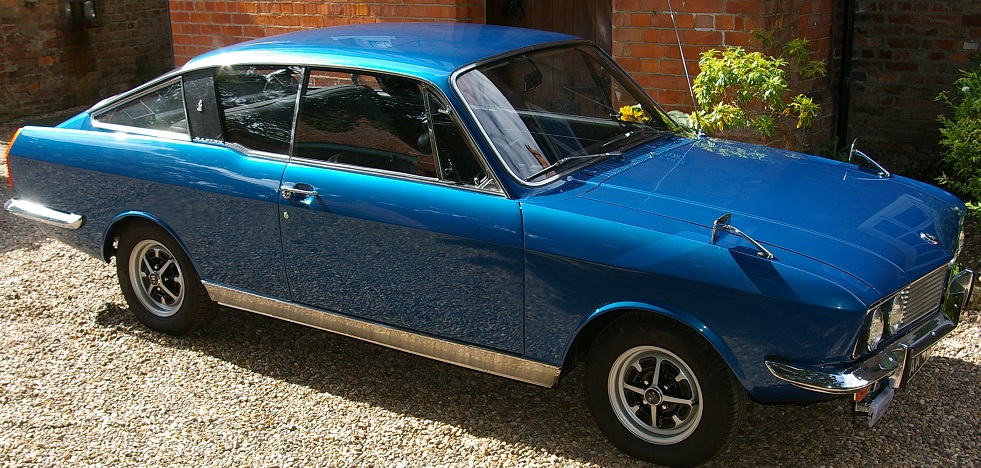
...ready for the next 50 years!
|
Edited by - AAA on 03 Oct 2021 13:38:30 |
|
|
|
AAA
49 Posts |
Posted - 03 Oct 2021 : 13:07:22
|
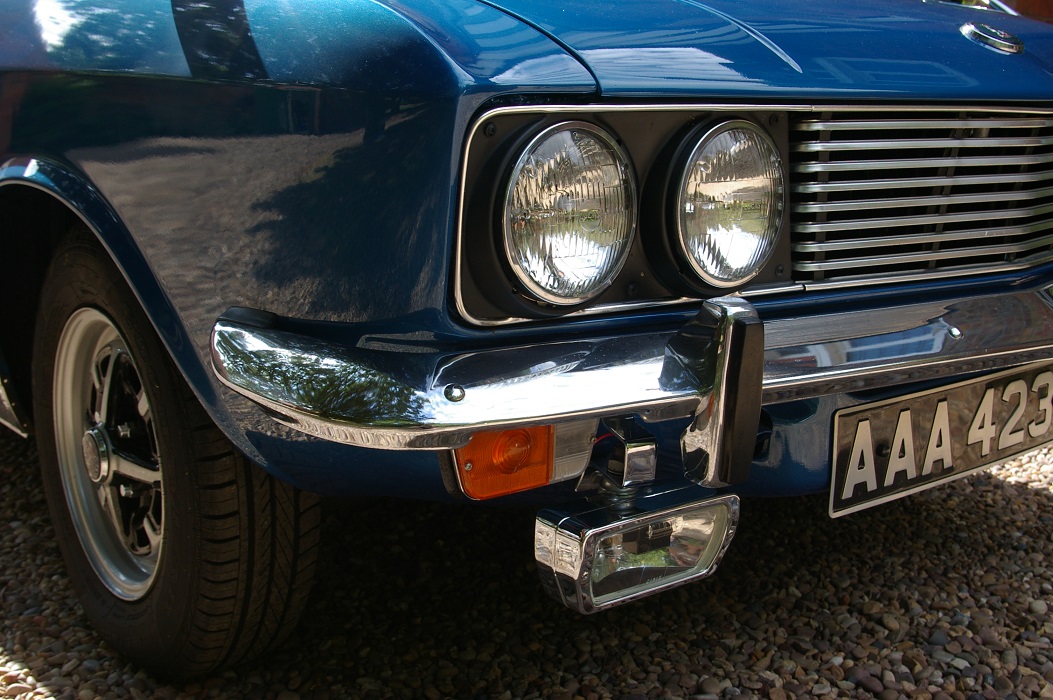
ACCESSORIES AND FINISHING TOUCHES
Instruction book, 1971 authorised dealers, 1971 dealers Europe, 8 track instructions.
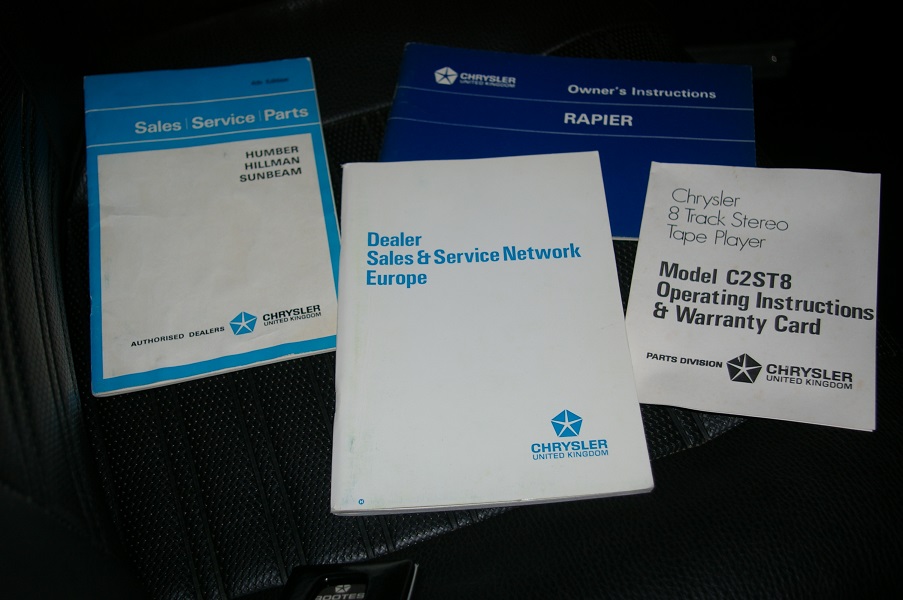
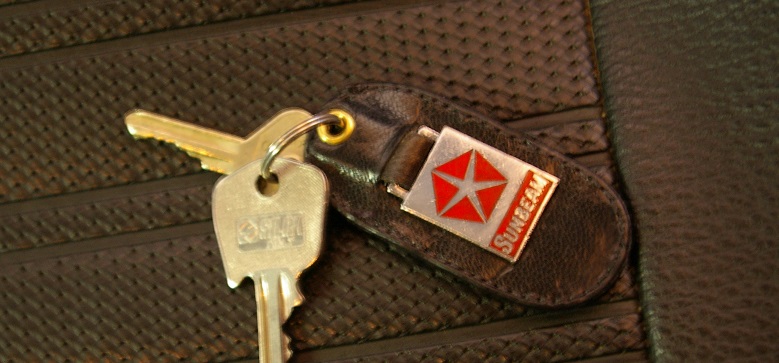
Key ring. Stamped Chrysler United Kingdom on the reverse. I have seen Hillman versions of these in the past too!
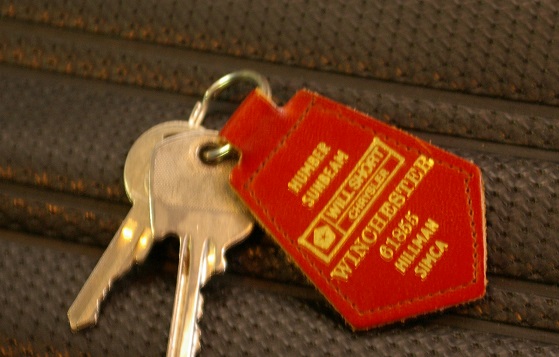
Spare keys. Key ring from the original supplying dealership.
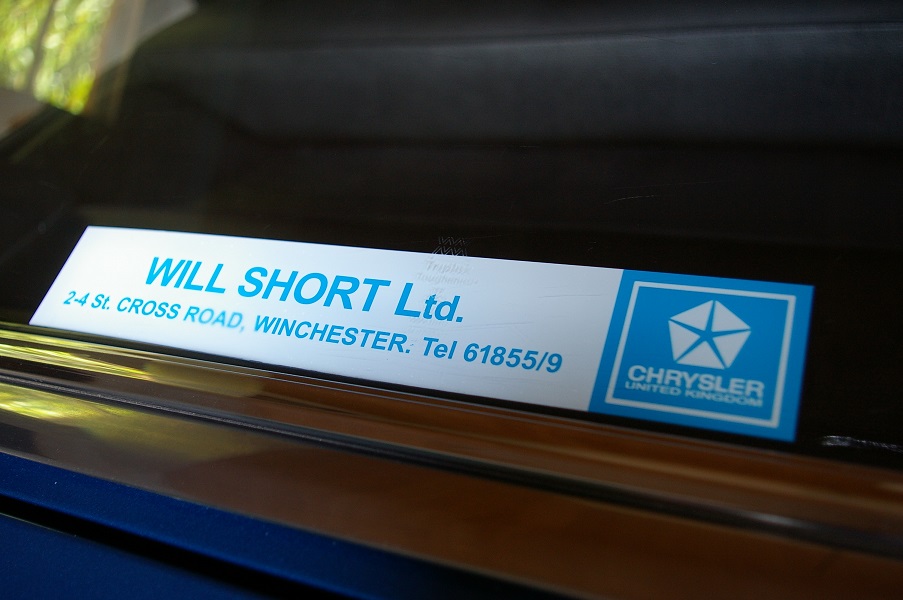
Dealer sticker for the original supplying dealer, I had this made.
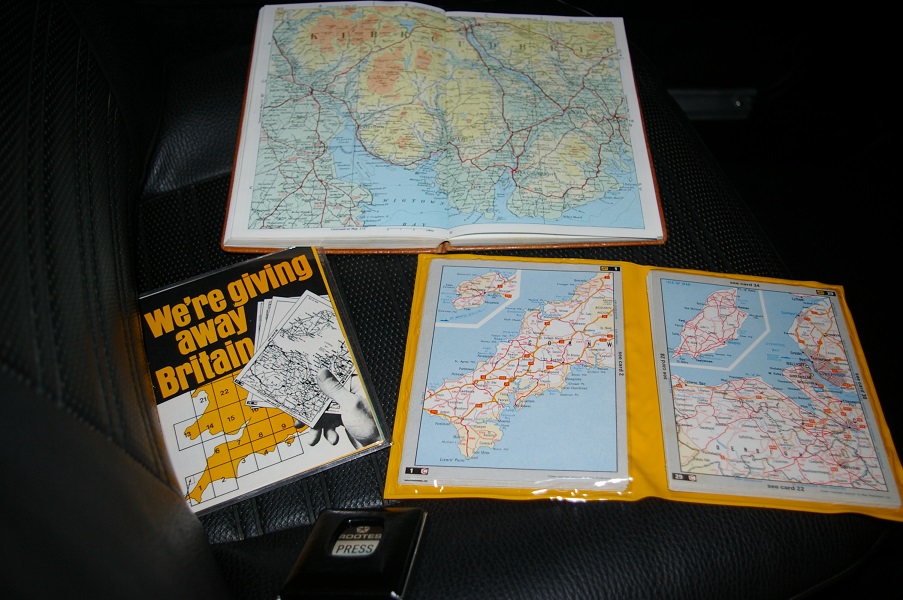
1971 Road atlas. 1970 Jet route planning cards.
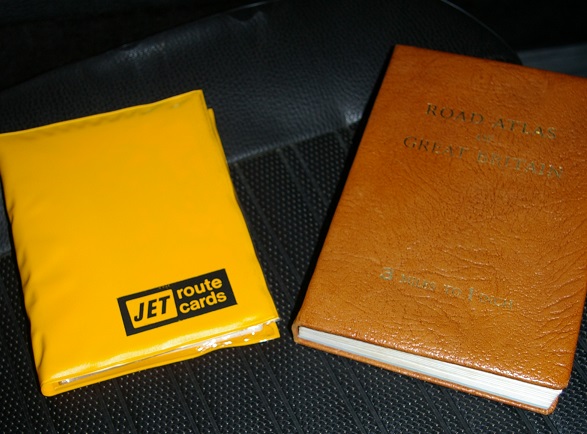
The Jet route cards were a promotion from Jet Petrol. 4 cards were free with every 4 gallons of petrol. The whole country is covered in 36 double-sided cards. An additional 1/6d bought the two wallets and gazetteer! This set is stamped The Claregate Garage, 20th March 1970.
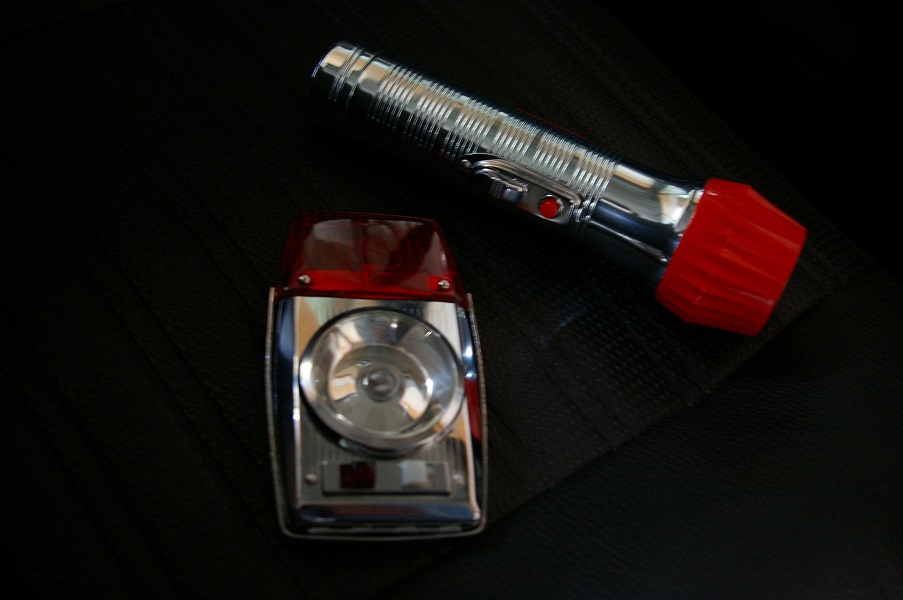
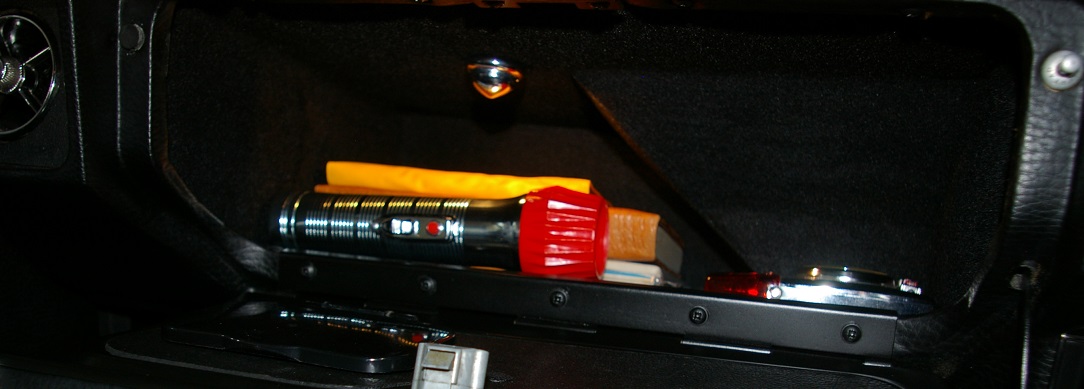
Pifco magnetic torch. Pifco President emergency lamp. An essential for the earlier fastback not fitted with hazard warning lights! The red lamp on top flashes, (when it has warmed up) and can be positioned to the offside rear of the car if broken down at night!
|
|
|
|
AAA
49 Posts |
Posted - 30 Sep 2021 : 18:18:26
|
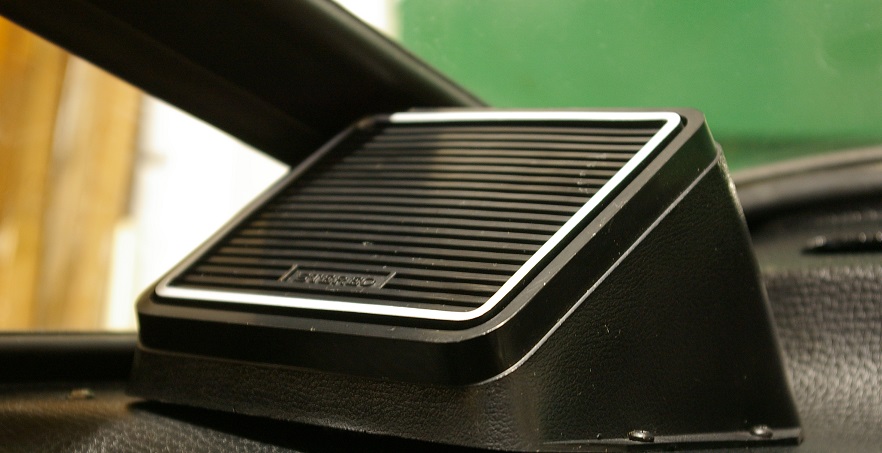
SPEAKERS
The car originally had a central 8" x 5" speaker in the dashboard. There is also a pressing with cut-out under the rear parcel shelf on the off side for a rear oval speaker.
The front speaker in my car was breaking up around the edges of the cone, but still working. I removed this and looked at the options available to replace it. There are a variety of dual voice coil oval speakers available, but nothing which is a direct replacement for the one in our cars. The closest, (which may be suitable) is sold as an upgrade for the Triumph Stag. This is available from Moss, but quite expensive.
I opted for a pair of new two-way 3.5" Bassforce speakers. I have mounted these side-by-side in the original speaker hole in the dashboard. I wouldn't recommend them, as although they are advertised as being quite shallow, the central tweeters sit proud of the units. To get them to fit I had to cut the protective grilles off the tweeters.
In the rear, I still had the twin speakers which were in the car when I bought it. I removed the drivers, to find that they were very brittle and breaking up. I bought a pair of new Sony three-way speakers of the same size. I had to modify the chassis of the new speakers to get them to sit slightly higher in the old pods to enable the magnets to clear the rear shelf. I cleaned the pods and airbrushed the aluminium-finished edge, as this was getting very faint.
Considering the limitations of the space available, (I wasn't willing to cut holes in panels or add anything further to the parcel shelves) the sound quality isn't too bad, treble and mid range especially! If I can find a Stag DVC speaker at a sensible price, I may give this a try in the dashboard! |
|
|
|
AAA
49 Posts |
Posted - 28 Sep 2021 : 17:30:25
|
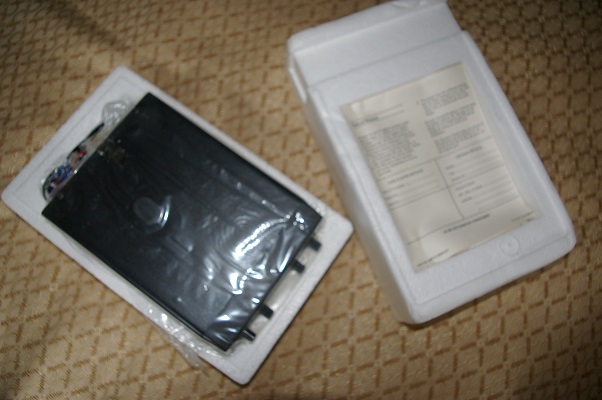
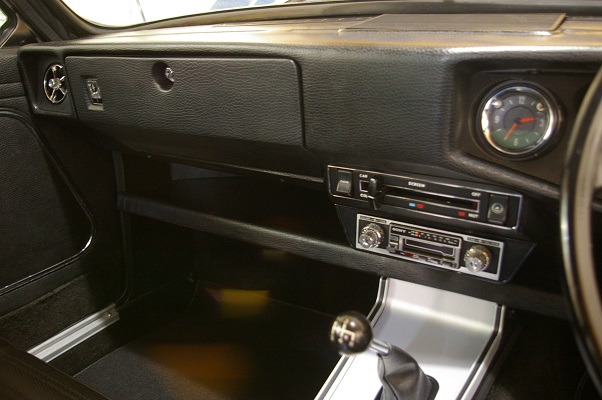
8 TRACK PLAYER
Amongst the items I have collected over the years was an unused 8 track tape player. This was still sealed in its box, the box being date stamped 1972. It was complete with mounting brackets, fitting instructions and guarantee card.
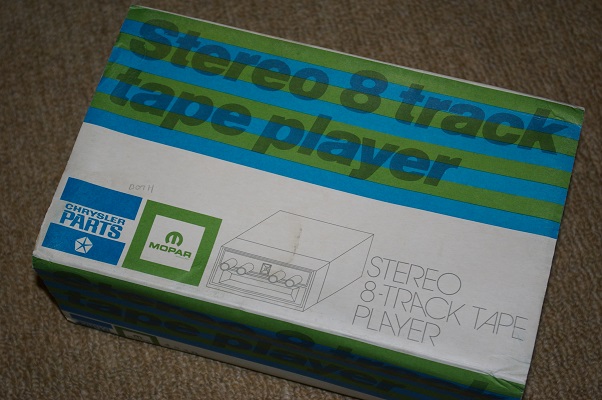
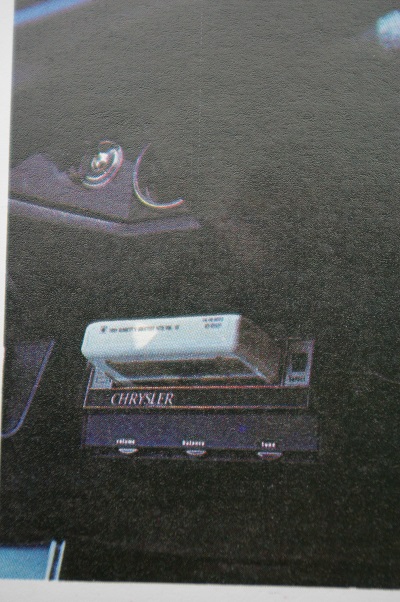
Although badged Chrysler, it is in fact a Motorola unit, model number TM213S. It was the second type offered as an option for the Rapier, the first type is shown below, (sorry about the quality, it's the only picture I have of the early type). I think this was a Motorola TM204S with a modified fascia.
According to the instructions, it is to be fitted to the right of the steering wheel, this is because the steering lock fitted from 1971 takes up the space recommended for the earlier type unit.
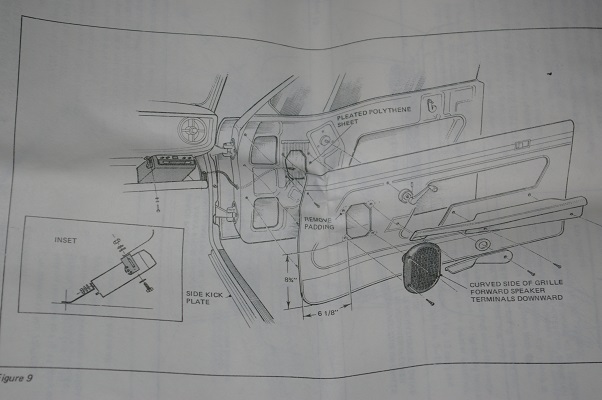
...i'm not sure about the holes in the door panels for the speakers!
I followed the instructions to position the unit. The instructions require the fitting of a switch alongside the radio to switch the speakers across from the radio, but I used a relay instead! I added a wire to the player which puts out a 12v supply when a tape cartridge is inserted. This powers the 14 terminal relay which switches the speakers across from the radio to the 8 track player automatically. When the cartridge is removed, it switches the speakers back to the radio. The relay is mounted behind the dashboard just above the 8 track player. The sound quality is surprisingly good!
|
Edited by - AAA on 29 Sep 2021 11:00:17 |
|
|
|
AAA
49 Posts |
Posted - 25 Sep 2021 : 13:26:25
|
RADIO
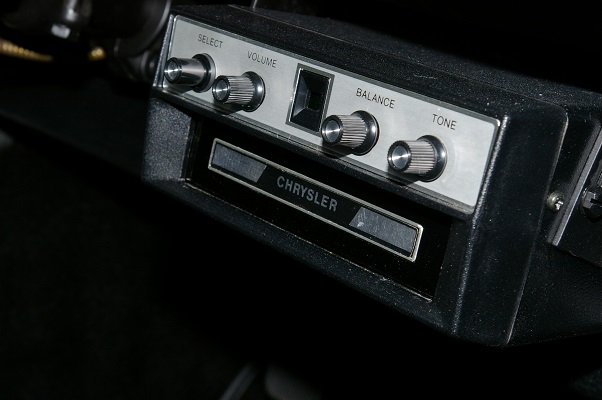
When I first bought the car it still had the original MW/LW push button radio fitted, wired to the central dashboard speaker. There was also a tatty AM radio cassette floating in the glove box, (held in place only by its wiring) wired to a pair of speakers on the rear parcel shelf. I removed the original radio, (I still have this) and the radio cassette, (which went in the bin).
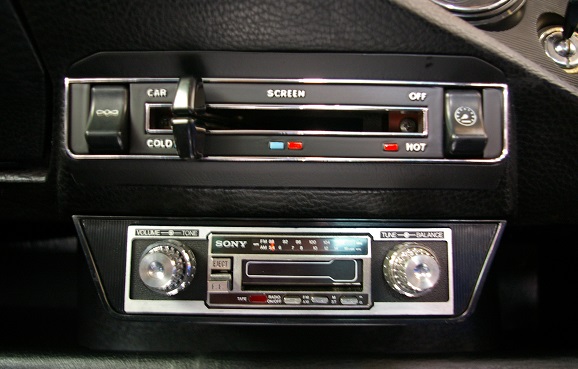
At Newark autojumble I found a Sony TC-24FA FM/AM radio cassette which looked the part and fitted using the existing surround panel and brackets. In those days cassettes were still common and easily available! I can't remember what I paid for it, but it wouldn't have been more than £5. I fitted this to the car, using the bridged-stereo method to make use of all three speakers, (the original centre speaker has a fairly high impedance, and the Sony unit can handle a load of surprisingly low impedance).
The radio has always worked perfectly, but the cassette deck has been temperamental! It always ran unsteadily initially, but cleared after fast-forwarding for a while. I put this down to worn drive belts, but never got around to attempting to fix it as it always got there eventually.
As the unit does look the part I have decided to keep it in the car, but to repair the cassette problem and smarten it up. Having removed the cover, I found a date stamp inside of 1975. I suspect this must have been a very expensive, top of the range radio when new! I don't remember having an FM radio in a new, modern car until the early 1990s!
The plate supporting the bottom flywheel bush had to be removed to replace the belts. Two of the three securing screws were missing, so someone had clearly been inside before! I struggled to get replacement screws, (an odd size, M2.8). I eventually tracked some down in a shop which sells radio controlled aircraft. I replaced the screws and belts and powered everything up - no improvement! Next, I cleaned the pinch roller, and lightly lubricated the capstan and motor bushes - still no improvement! I then focussed on the micro-switch which controls the motor when a tape is inserted, this proved to be the problem! I had to remove the AM radio tuner circuit board to get at it. I couldn't find a suitable replacement switch anywhere, so took the switch apart and refaced the contacts. Now back together, everything is working as it should. I touched a few marks in on the fascia and gave the case a fresh coat of spray paint. I used some millboard covered with vinyl between the black radio panel and the parcel shelf.
The unit is now back in the car, wired through a 14 terminal relay which in the off state connects it to the speakers.
|
|
|
|
AAA
49 Posts |
Posted - 22 Sep 2021 : 19:46:40
|
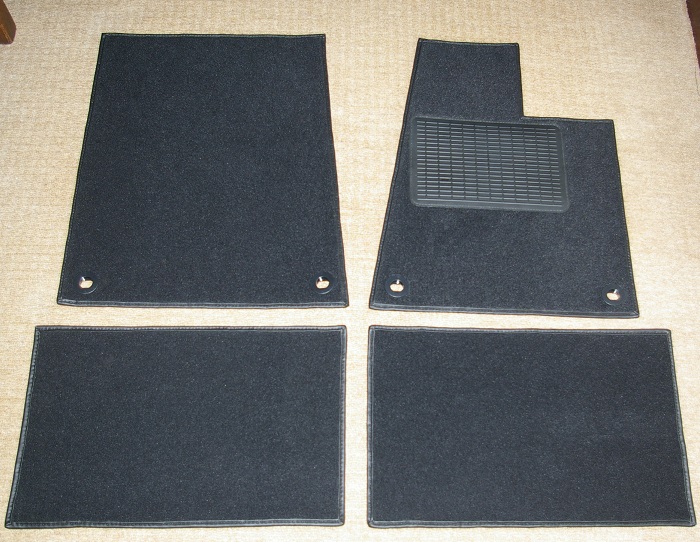
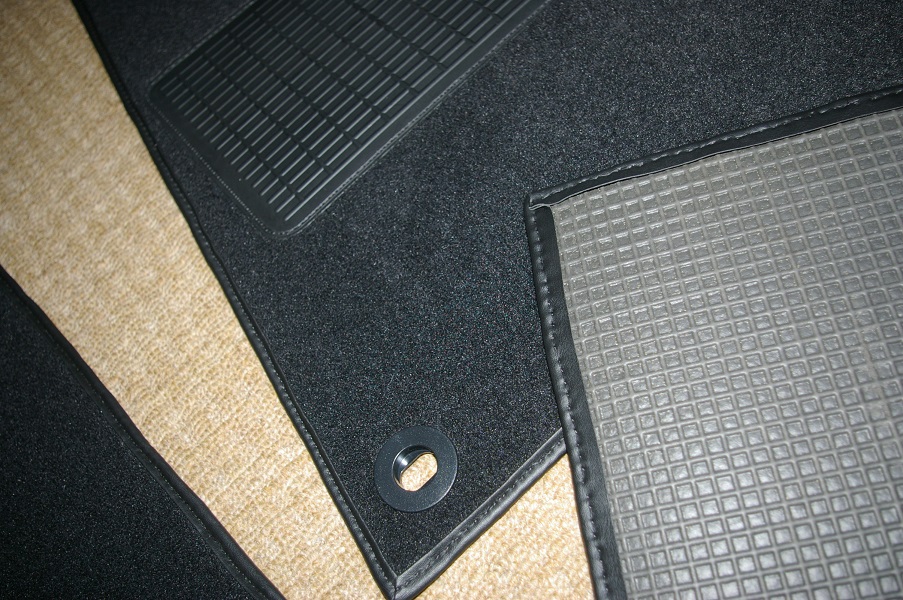
FLOOR MATS
Many years ago, I salvaged some mats from a Rapier in a scrap yard. I don't think these were a genuine factory accessory, more likely Halfords or Motor Factor ones made specifically for the Hunter range. They fitted the car perfectly! They were made of a tough ribbed carpet, with a rubber heel pad on the driver's mat and all edged with a woven edge tape. After a good clean and a few repairs to the driver's side mat, these gave good service until I sold the car.
When I bought the car back, the mats had gone! I have managed for the last few years with some cheap rubber ones, but these have never fitted and always seem to be in the way.
I had some carpet left over from re-trimming the boot. This is tough and rubber-backed. I made paper patterns in the car, using what I could remember of the old mats. I edged each with some sew-on vinyl edging tape, (£1 per metre) and added a heel pad, (£2.30). I ordered some hold-down clips for the front mats from China. The bases of these are fixed into the car's carpet with a single metal spike, so only leave a small pin-hole in the carpets if removed.
|
Edited by - AAA on 22 Sep 2021 19:59:31 |
|
|
|
AAA
49 Posts |
Posted - 20 Sep 2021 : 19:19:39
|
SEAT BELTS
I fitted a pair of lap belts to the rear seats some years ago to strap a child seat in. These are a modern two point type, which can easily be tucked down out of sight behind the seat when not in use.
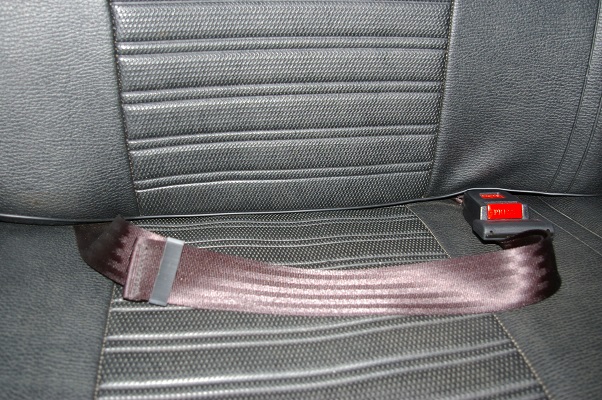
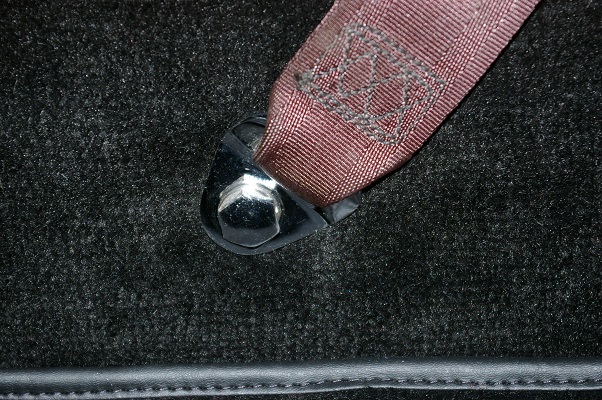
I sent the front belts away for re-webbing. I also had new chrome end plates and modern adjusters fitted. The adjusters are much easier to use than the originals, and aren't too obvious.
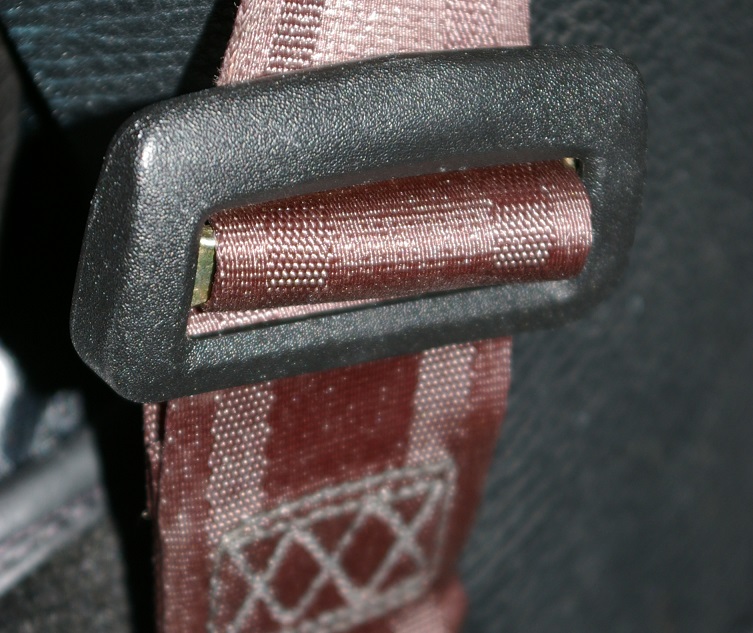
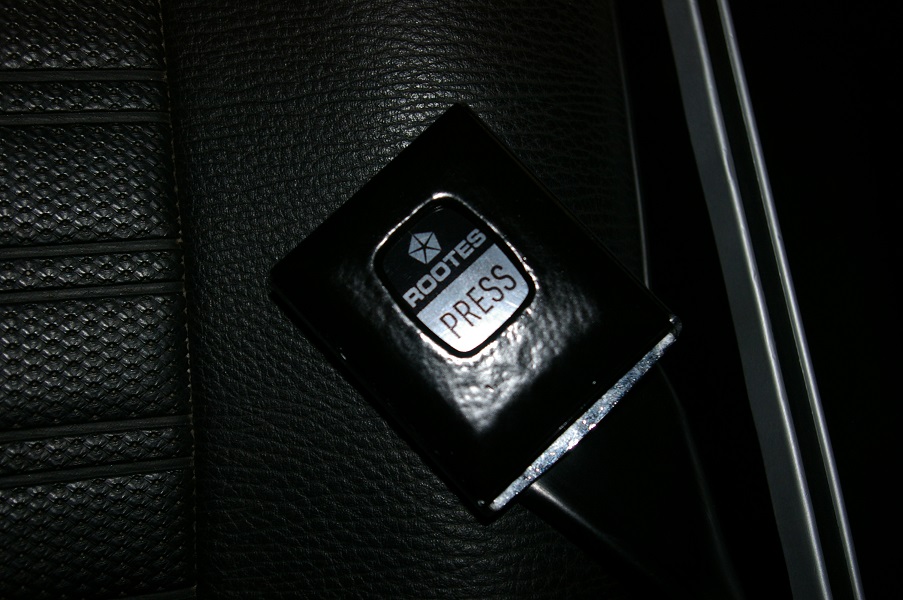
Two types of belts were available for the earlier fastbacks. A Kangol magnetic type, and a Britax latch type. The Britax version seems to have been the most common, and is the type fitted to my car. The decals on both type of buckles can get in a bit of a mess! The Britax ones especially lose most of their printing in the centre.
Replacement decals are available for the Kangol type, but I couldn't find any for the Britax belts. I sent off a few emails, eventually finding a company who were willing to make some! I sent them some dimensions and a poor quality photo of an original one from the 1971 model year brochure. Four days later, an envelope arrived...
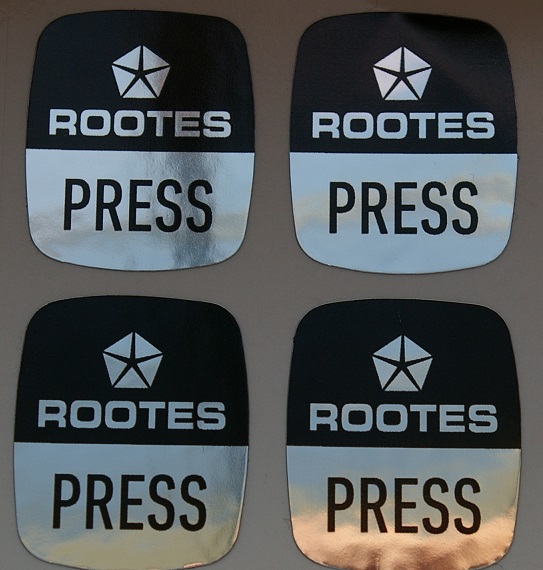
Comparing these to the remains of my originals, they appear to be exactly right! Some time during production in 1971, the decals were changed to a simple PRESS type with no branding. I suspect my car was one of the last fitted with the original type.
|
|
|
|
AAA
49 Posts |
Posted - 20 Sep 2021 : 12:37:03
|
That's a good spot! Not come across this before. Might be worth a try!quote:
Originally posted by Panky
I'm wondering if this product would be an alternative to the chroming process
https://www.ebay.co.uk/itm/143950476786
Might be worth a try if you have any more little bits to do.
|
|
|
|
Panky
United Kingdom
70 Posts |
Posted - 20 Sep 2021 : 12:31:10
|
I'm wondering if this product would be an alternative to the chroming process
https://www.ebay.co.uk/itm/143950476786
Might be worth a try if you have any more little bits to do. |
|
|
|
AAA
49 Posts |
Posted - 20 Sep 2021 : 08:19:18
|
Thanks very much for your input, it is much appreciated!
The issue isn't so much removing the paint, more what the paint might have done to the underlying surface! I have had success removing paint from plastic just by gently scraping with a fingernail or credit card, soaking in hot water, a method similar to the one you suggest and even using chemical paint stripper under running water as a last resort. The black areas aren't a problem at all, just the chrome areas! Even with any overpainting visibly removed, there can apparently sometimes still be a problem with the final finish. I am still happy to take anything available and have a try though! quote:
Originally posted by Commerlad
If you do get the offer of any plastic parts that have been overpainted , then it can easily be stripped by soaking in Dettol. (In a sealed tub for 24 hrs ) then wash off and brush with a toothbrush. Will not affect the plastic and removes all traces of any type of paint.
Sometimes I think laterally, but then I have to get up!
|
|
|
|
Commerlad
United Kingdom
50 Posts |
Posted - 19 Sep 2021 : 18:18:29
|
If you do get the offer of any plastic parts that have been overpainted , then it can easily be stripped by soaking in Dettol. (In a sealed tub for 24 hrs ) then wash off and brush with a toothbrush. Will not affect the plastic and removes all traces of any type of paint.
Sometimes I think laterally, but then I have to get up! |
|
|
|
Topic |
|
|
|